While the promise of a “cool oasis” is appealing, central air installation is less like buying a simple appliance and more like undertaking a sophisticated home improvement project. It involves far more than just swapping out a box; it requires integrating a complex HVAC mechanical system into your home’s unique infrastructure. True efficiency is not achieved by guessing—it requires planning and expertise to ensure your system handles the specific heating and cooling demands of your climate.
Because every home is different, the “invisible labor” performed before installation is often the most critical factor in your long-term satisfaction. Issues like undersized ductwork, poor insulation, or incompatible electrical systems can undermine even the best equipment. Identifying these variables early prevents the frustration of uneven cooling and wasted energy, ensuring that your new system operates exactly as intended from day one.
For homeowners navigating this landscape, the difference between a system that lasts 15 years and one that fails early often comes down to the pre-installation intellectual work. Partnering with experienced HVAC technicians ensures that these critical load calculations are done correctly from the very start, protecting your long-term investment. Whether you are retrofitting an older property or upgrading to a high-efficiency heat pump, understanding the technical and financial variables is the only way to ensure you are making a good investment.
To help you navigate this complex process and secure the best outcome for your home, this guide explores the following core topics:
Key Takeaways
Key Takeaways: Mastering Your Central Air Installation
- Professional Integration: Why central air installation is a complex infrastructure project rather than a simple appliance swap.
- Roadmap to Comfort: A 7-step guide from technical load calculations to final system calibration and testing.
- Site Preparation: Essential checks for electrical compatibility, ductwork integrity, and local permit requirements.
- Structural Solutions: How HVAC experts solve challenges like limited space, legacy duct issues, and electrical upgrades.
- System Longevity: Post-installation tips for filter care and professional maintenance to protect your SEER rating.
- System Type Comparisons: Evaluation of central split systems, ductless mini-splits, and hybrid heat pumps to match your home’s infrastructure.
Understanding the Importance of Central Air Installation

Central air conditioning systems offer whole-home cooling that is both efficient and discreet. Proper installation is vital because it impacts the system’s performance, longevity, and energy usage. Whether upgrading an existing system or installing new air conditioning for the first time, the installation must be done with precision.
- Efficiency: Correct installation ensures the system uses energy optimally, reducing utility bills.
- Comfort: A properly installed system maintains consistent temperatures throughout the home.
- Longevity: Quality installation prevents premature wear and potential breakdowns.
- Indoor Air Quality: Proper ductwork and sealing help improve airflow and reduce allergens.
- Safety: Professional installation adheres to safety regulations, avoiding risks such as electrical hazards.
7 Essential Steps in Central Air Conditioning Installation
Installing a central air system requires careful planning and skilled execution. Below is a detailed guide outlining the essential steps to help you understand what to expect during the process.
1. Evaluating Your Home’s Cooling Needs
Before the central air installation process begins, professionals conduct a thorough assessment of the home to determine the correct size and type of system required. This evaluation considers factors like square footage, insulation quality, window placement, and existing ductwork.
- Load Calculation: Determines how much cooling capacity is necessary.
- System Type: Decides on a split system or packaged unit based on space and efficiency.
2. Selecting the Right Equipment
Choosing energy-efficient, appropriately sized equipment is crucial. This includes selecting an outdoor condenser unit and an indoor evaporator coil or air handler that matches the cooling requirements identified earlier. If your system requires an indoor fan unit to circulate the cooled air, making sure the air handler is correctly sized is just as important as selecting the right outdoor unit.
- SEER Rating: Seasonal Energy Efficiency Ratio measures energy efficiency.
- Compatibility: Ensures that indoor and outdoor units work seamlessly together.
3. Preparing the Installation Site
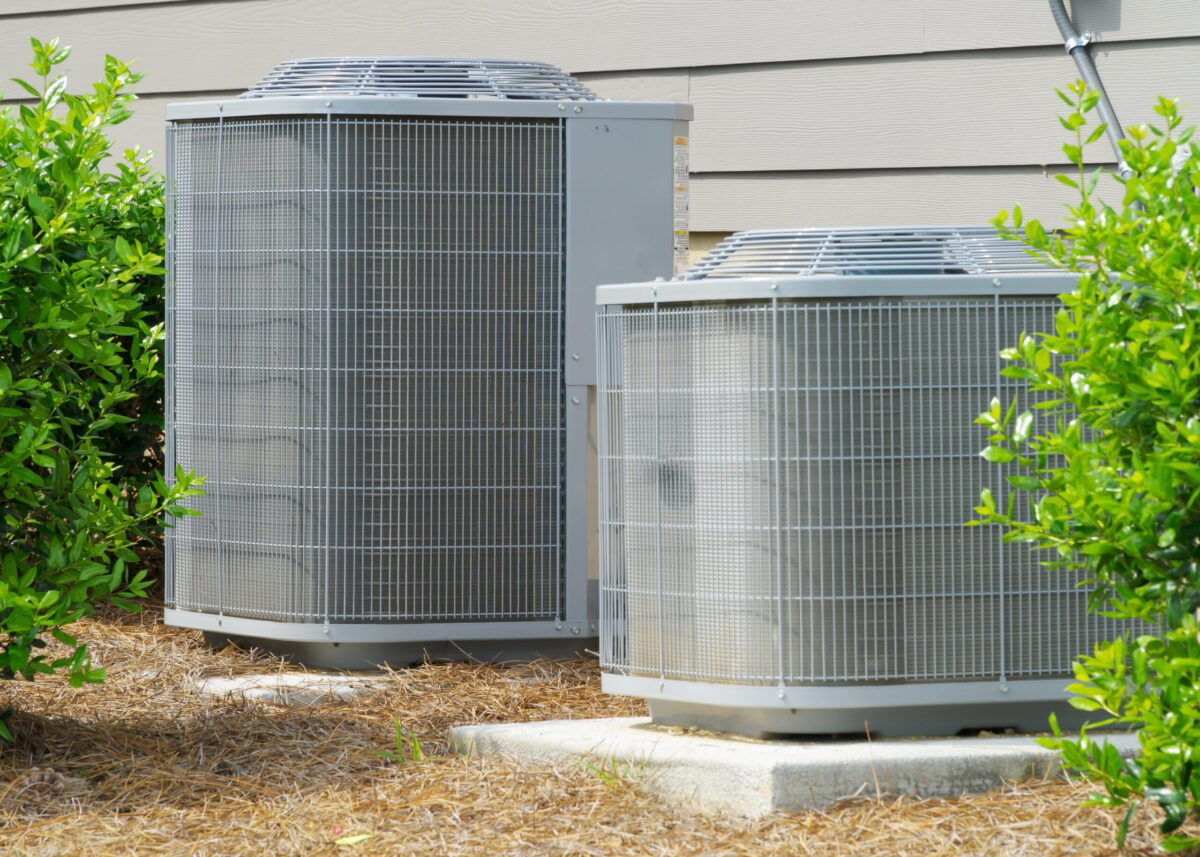
Proper site preparation involves clearing space for the outdoor unit and ensuring adequate support and ventilation. Ensuring your AC condenser has enough clearance is critical to prevent overheating and maintain optimal airflow during the hottest months. Inside the home, access points for ductwork and electrical connections should be identified and readied to pave the way for a seamless central air installation.
- Outdoor Pad Setup: Provides a stable base for the condenser unit.
- Access Pathways: Prepare ducts and wiring routes within walls or attics.
4. Installing the Ductwork and Equipment
Installation of the ductwork is a critical step, followed by mounting indoor and outdoor units. The duct system directs cool air efficiently to every room, so proper sealing and insulation are essential to prevent air loss.
- Sealing: Uses mastic or foil tape to prevent leaks.
- Insulation: Reduces thermal loss along duct paths.
5. Connecting the Electrical and Refrigerant Lines
Qualified technicians connect the electrical wiring and refrigerant lines, which requires careful attention to specifications and safety standards to avoid hazards and ensure system functionality.
- Electrical Wiring: Includes circuit breakers, disconnect switches, and proper grounding.
- Refrigerant Lines: Must be correctly sized and leak-tested for airtightness.
6. System Testing and Calibration
After installation, the central air system undergoes extensive testing to verify that all components work correctly. Calibration of the thermostat and airflow adjustments optimize comfort and efficiency.
- Performance Testing: Checks cooling capacity and airflow rates.
- Thermostat Setup: Ensures accurate temperature control.
7. Post-Installation Cleanup and User Guidance
Finally, the work area is cleaned, and homeowners receive a walkthrough on system operation and maintenance tips. This ensures the system performs well and users know how to manage it responsibly following the central air installation.
- Cleanup: Removal of debris and restoration of any disturbed areas.
- Instruction: Covers filter replacement schedules and energy-saving tips.
Key Considerations Before Starting Central Air Installation

Before the central air installation, it’s important to prepare properly to avoid common pitfalls and ensure a smooth process. Understanding these aspects helps reduce surprises and enhances customer satisfaction with the final setup.
- Budget Planning: Include both equipment and labor costs, plus any potential upgrades needed. If you are completely overhauling your home’s climate control, understanding exactly how much to replace a heating and air conditioning system will help you set realistic financial expectations before the project begins.
- Permits and Regulations: Confirm local codes and obtain necessary approvals to comply with all legal requirements.
- Home Readiness: Evaluate your home’s insulation, window integrity, and duct system condition—upgrades may be necessary.
- Professional Expertise: Selecting certified HVAC technicians ensures adherence to best practices.
- Warranty and Maintenance Plans: Understand what is covered and consider service agreements for long-term support.
Common Challenges in Central Air Installation and How to Overcome Them
Even with thorough planning, some challenges may arise during central air installation. Addressing these efficiently helps maintain the project timeline and achieves an optimal system function.
Space Constraints
Limited outdoor space for the AC condenser or narrow interior walls can complicate installation. Creative placement options and custom duct design solutions help maximize available space without sacrificing performance.
Ductwork Issues
Older duct systems might be too small, leaky, or poorly configured. Professionals often need to repair, replace, or extend ductwork to ensure proper airflow and avoid uneven cooling.
Because ductwork modifications can be highly complex, relying on professional air conditioning contractors will guarantee your home receives balanced and efficient airflow in every room.
Electrical Compatibility
Older homes may lack adequate electrical infrastructure to support modern central air units, necessitating panel upgrades or new wiring installation to meet power demands safely and legally.
Indoor Air Quality Concerns
Improper sealing or installation defects can cause air leaks and introduce dust or allergens. Using quality materials and thorough sealing practices ensures a better indoor air quality for occupants.
Weather and Environmental Factors
The central air installation process may be influenced by weather conditions such as extreme heat or rain. Planning around favorable conditions can prevent delays and reduce risk during outdoor unit setup.
Working closely with local cooling experts can help you easily navigate these regional weather challenges and keep your installation on schedule.
Frequently Asked Questions About Central Air Installation
Addressing common questions helps homeowners feel more confident about the central air installation process and their investment.
- How long does central air installation typically take? Installation usually takes between one to three days, depending on the home size and system complexity.
- Can I install central air myself? Due to technical complexity and safety risks, professional installation is strongly recommended.
- What maintenance is required after installation? Regular filter changes, annual system checkups, and duct inspections keep the system running smoothly.
- Will installing central air increase my home’s value? Yes, central air conditioning is a desirable feature that often boosts resale value.
- Are there energy-efficient options available? Many modern central air systems have high SEER ratings and utilize smart thermostats to minimize energy consumption.

System Type Comparisons
When planning a modern central air installation, homeowners face three distinct architectural choices, each designed to solve specific infrastructure challexnges while maximizing efficiency.
1. Central Split Systems (The Standard) The Central Split System is the default for homes with existing ductwork. It places a compressor outside and an evaporator coil inside. While it is generally the most cost-effective central air installation option—typically costing between $6,000 and $11,500—its performance relies entirely on the quality of your ducts. Leaky ductwork can significantly undermine efficiency.
2. Ductless Mini-Splits (The Retrofit Solution) For homes lacking ducts or for room additions, Ductless Mini-Splits are superior. They connect an outdoor condenser directly to indoor wall units, eliminating duct loss and offering precise zoning control.
- Deep Dive: If you are comparing these options, see our detailed guide on mini-split vs central air to visualize the differences.
3. Heat Pumps (The Hybrid Efficiency Leader) Physically identical to standard ACs, Heat Pumps use a reversing valve to provide both heating and cooling. The “dual-fuel” configuration allows a heat pump to handle moderate temperatures while a gas furnace takes over in extreme cold.
Take the Next Step Toward Comfortable Cooling
Installing central air conditioning is a significant home improvement that enhances comfort and value. Understanding the detailed process ensures you make informed decisions and achieve a smooth installation experience. To learn more about your options or schedule a professional installation, contact Rolls Mechanical today by visiting our contact page. Our expert team is ready to guide you through every step toward a cooler, more comfortable home environment.